Build your own stable style door
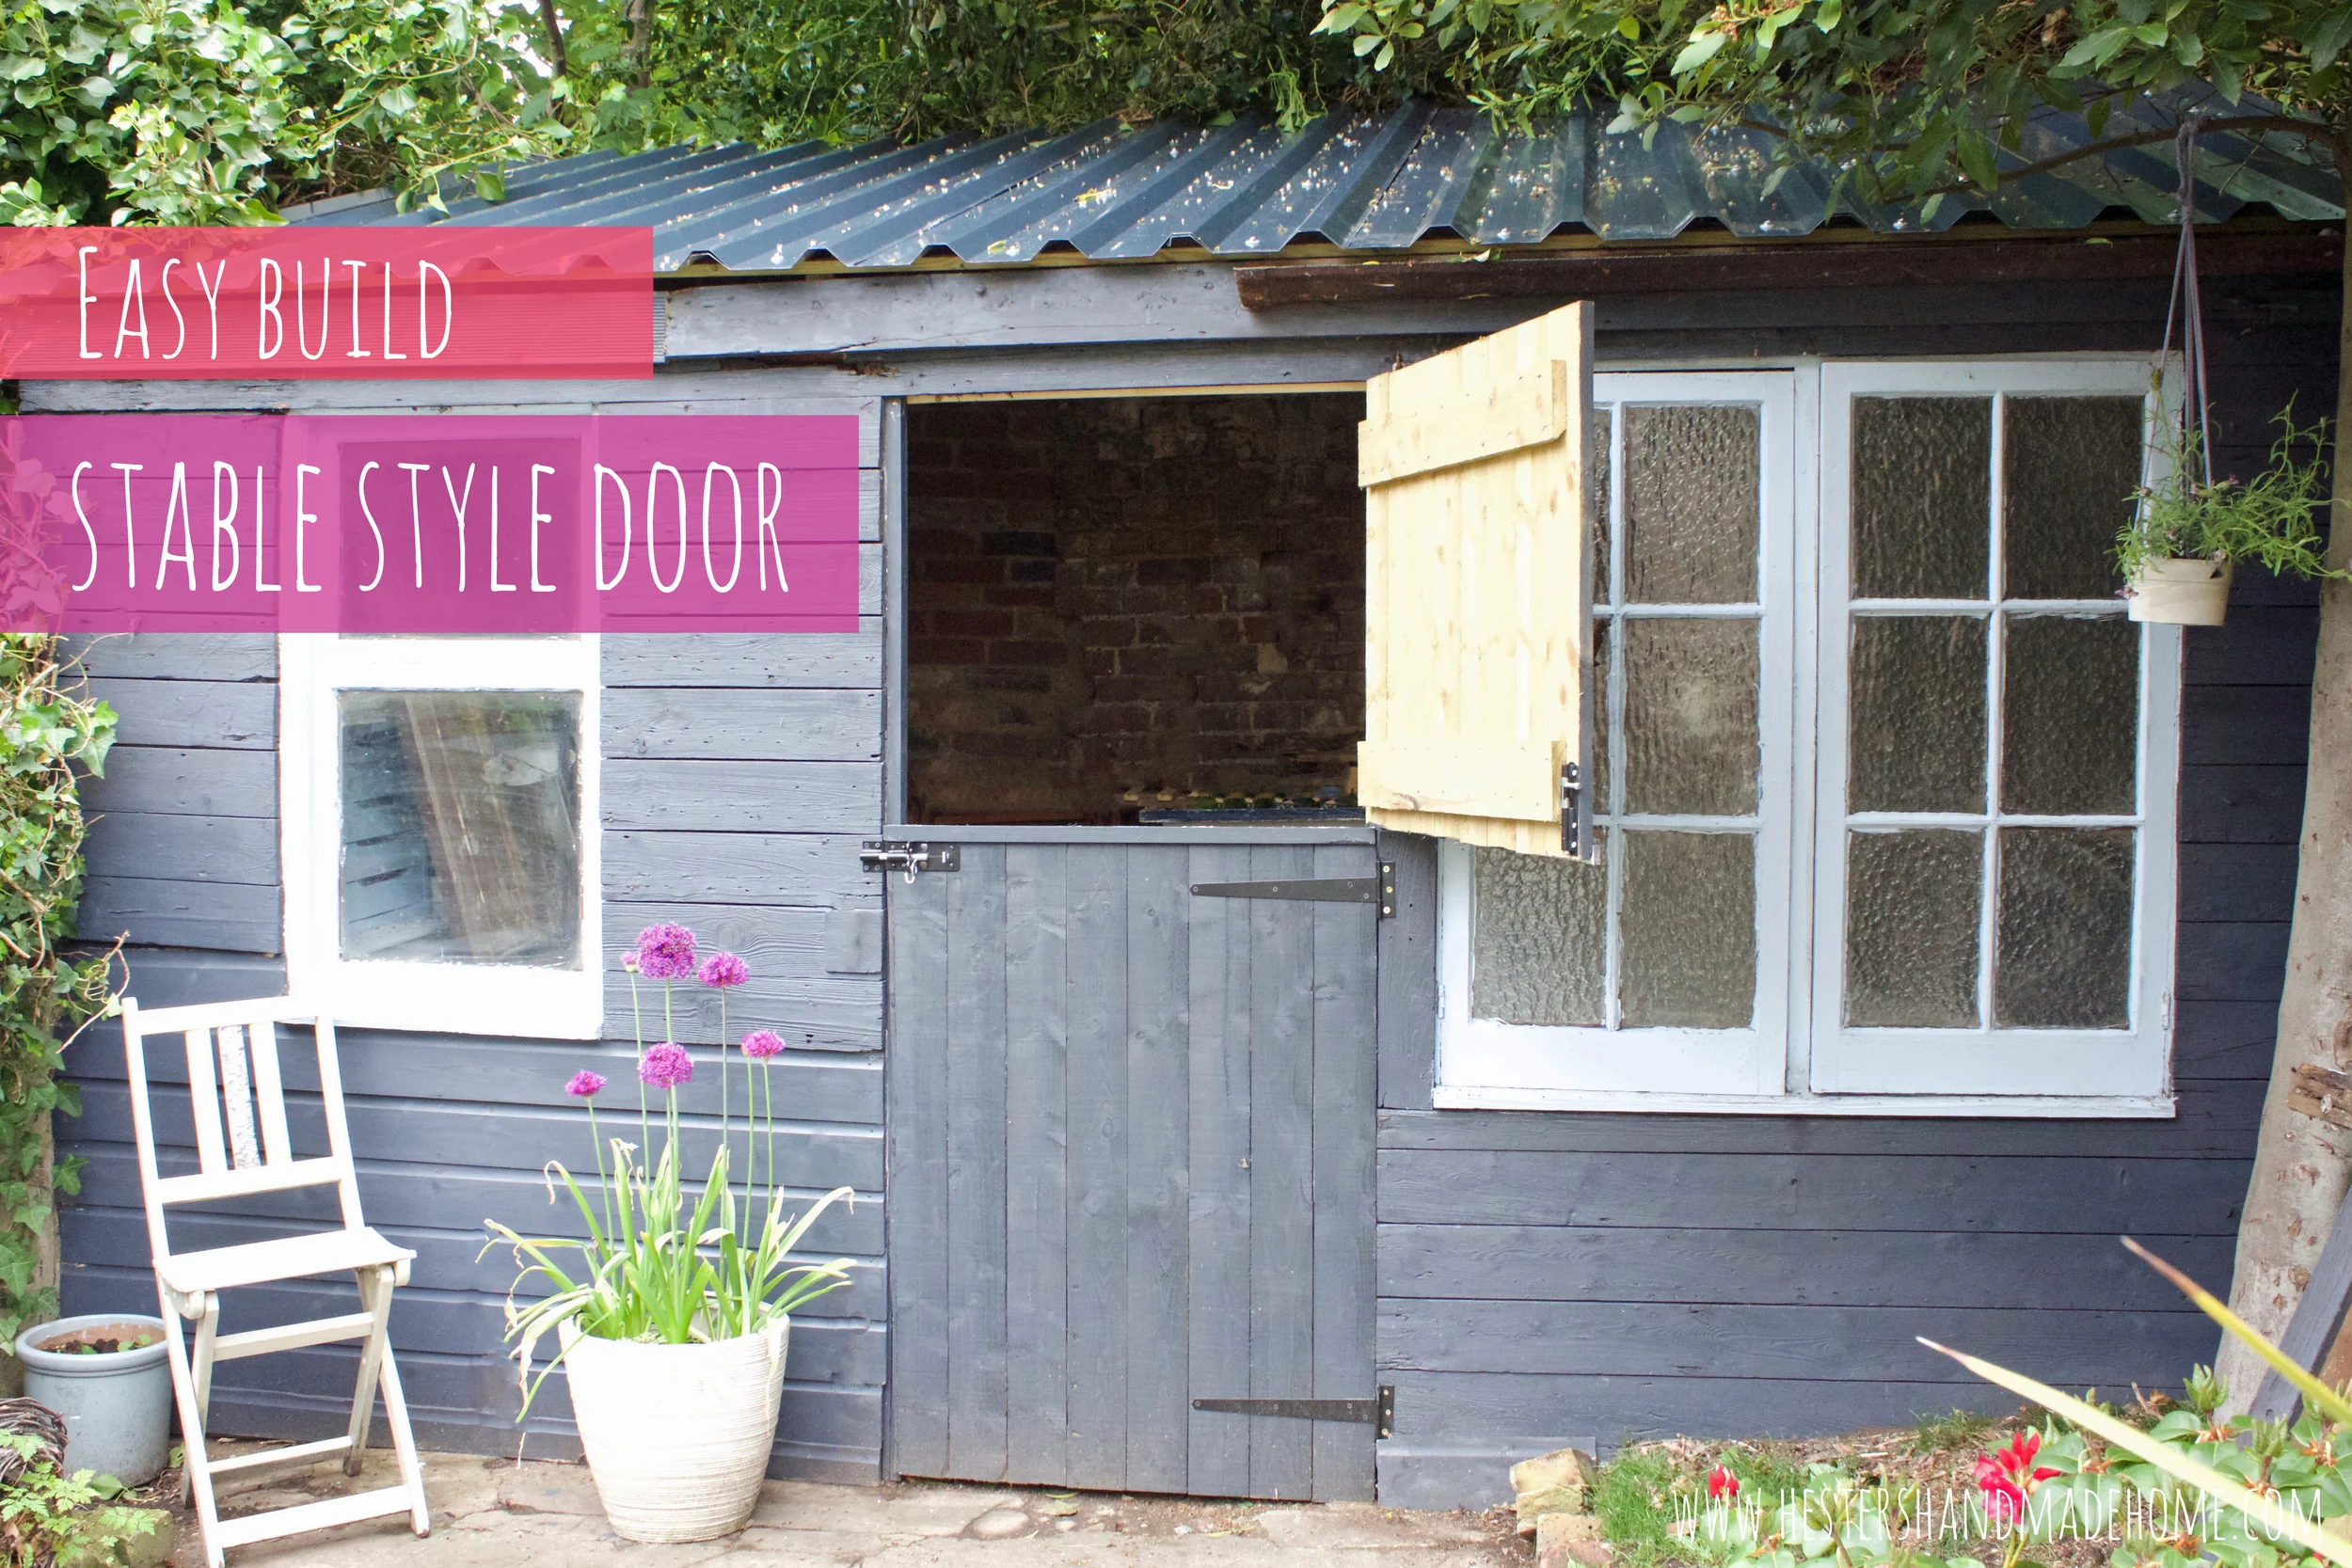
If you are a Handmade Home followers you would have seen that I took last Thursday off video making and worked on my shed, well the shed had a rather big makeover! When we bought the house the building in the back of the garden was overgrown with ivy, the door only opened a little bit, it had a asbestos roof and it was a true bug sanctuary. I couldn't wait to get my hands on it and transform the spider hotel into a proper work shed. The roof was removed by the asbestos people, I replaced all the rotted cladding, gave the inside a good scrub, gave the outside a grey stain and on Tuesday the new roof got installed. All I needed was a new door and I rather fancied a stable style door, for some reason in America these are called Dutch doors, anybody know why? It's not like all of us in Holland have these in our homes, well my parents have but they are sort of the only ones I know that have one... Anyway got sidetracked there ;) Have a look at what my shed looked like a before it's transformation.
Looks a bit different from the banner image doesn't? Brown, overgrown and half painted windows. Love the new metal sheet roof, might just go sit in the shed next time it rains just to hear the drops hit the roof :)
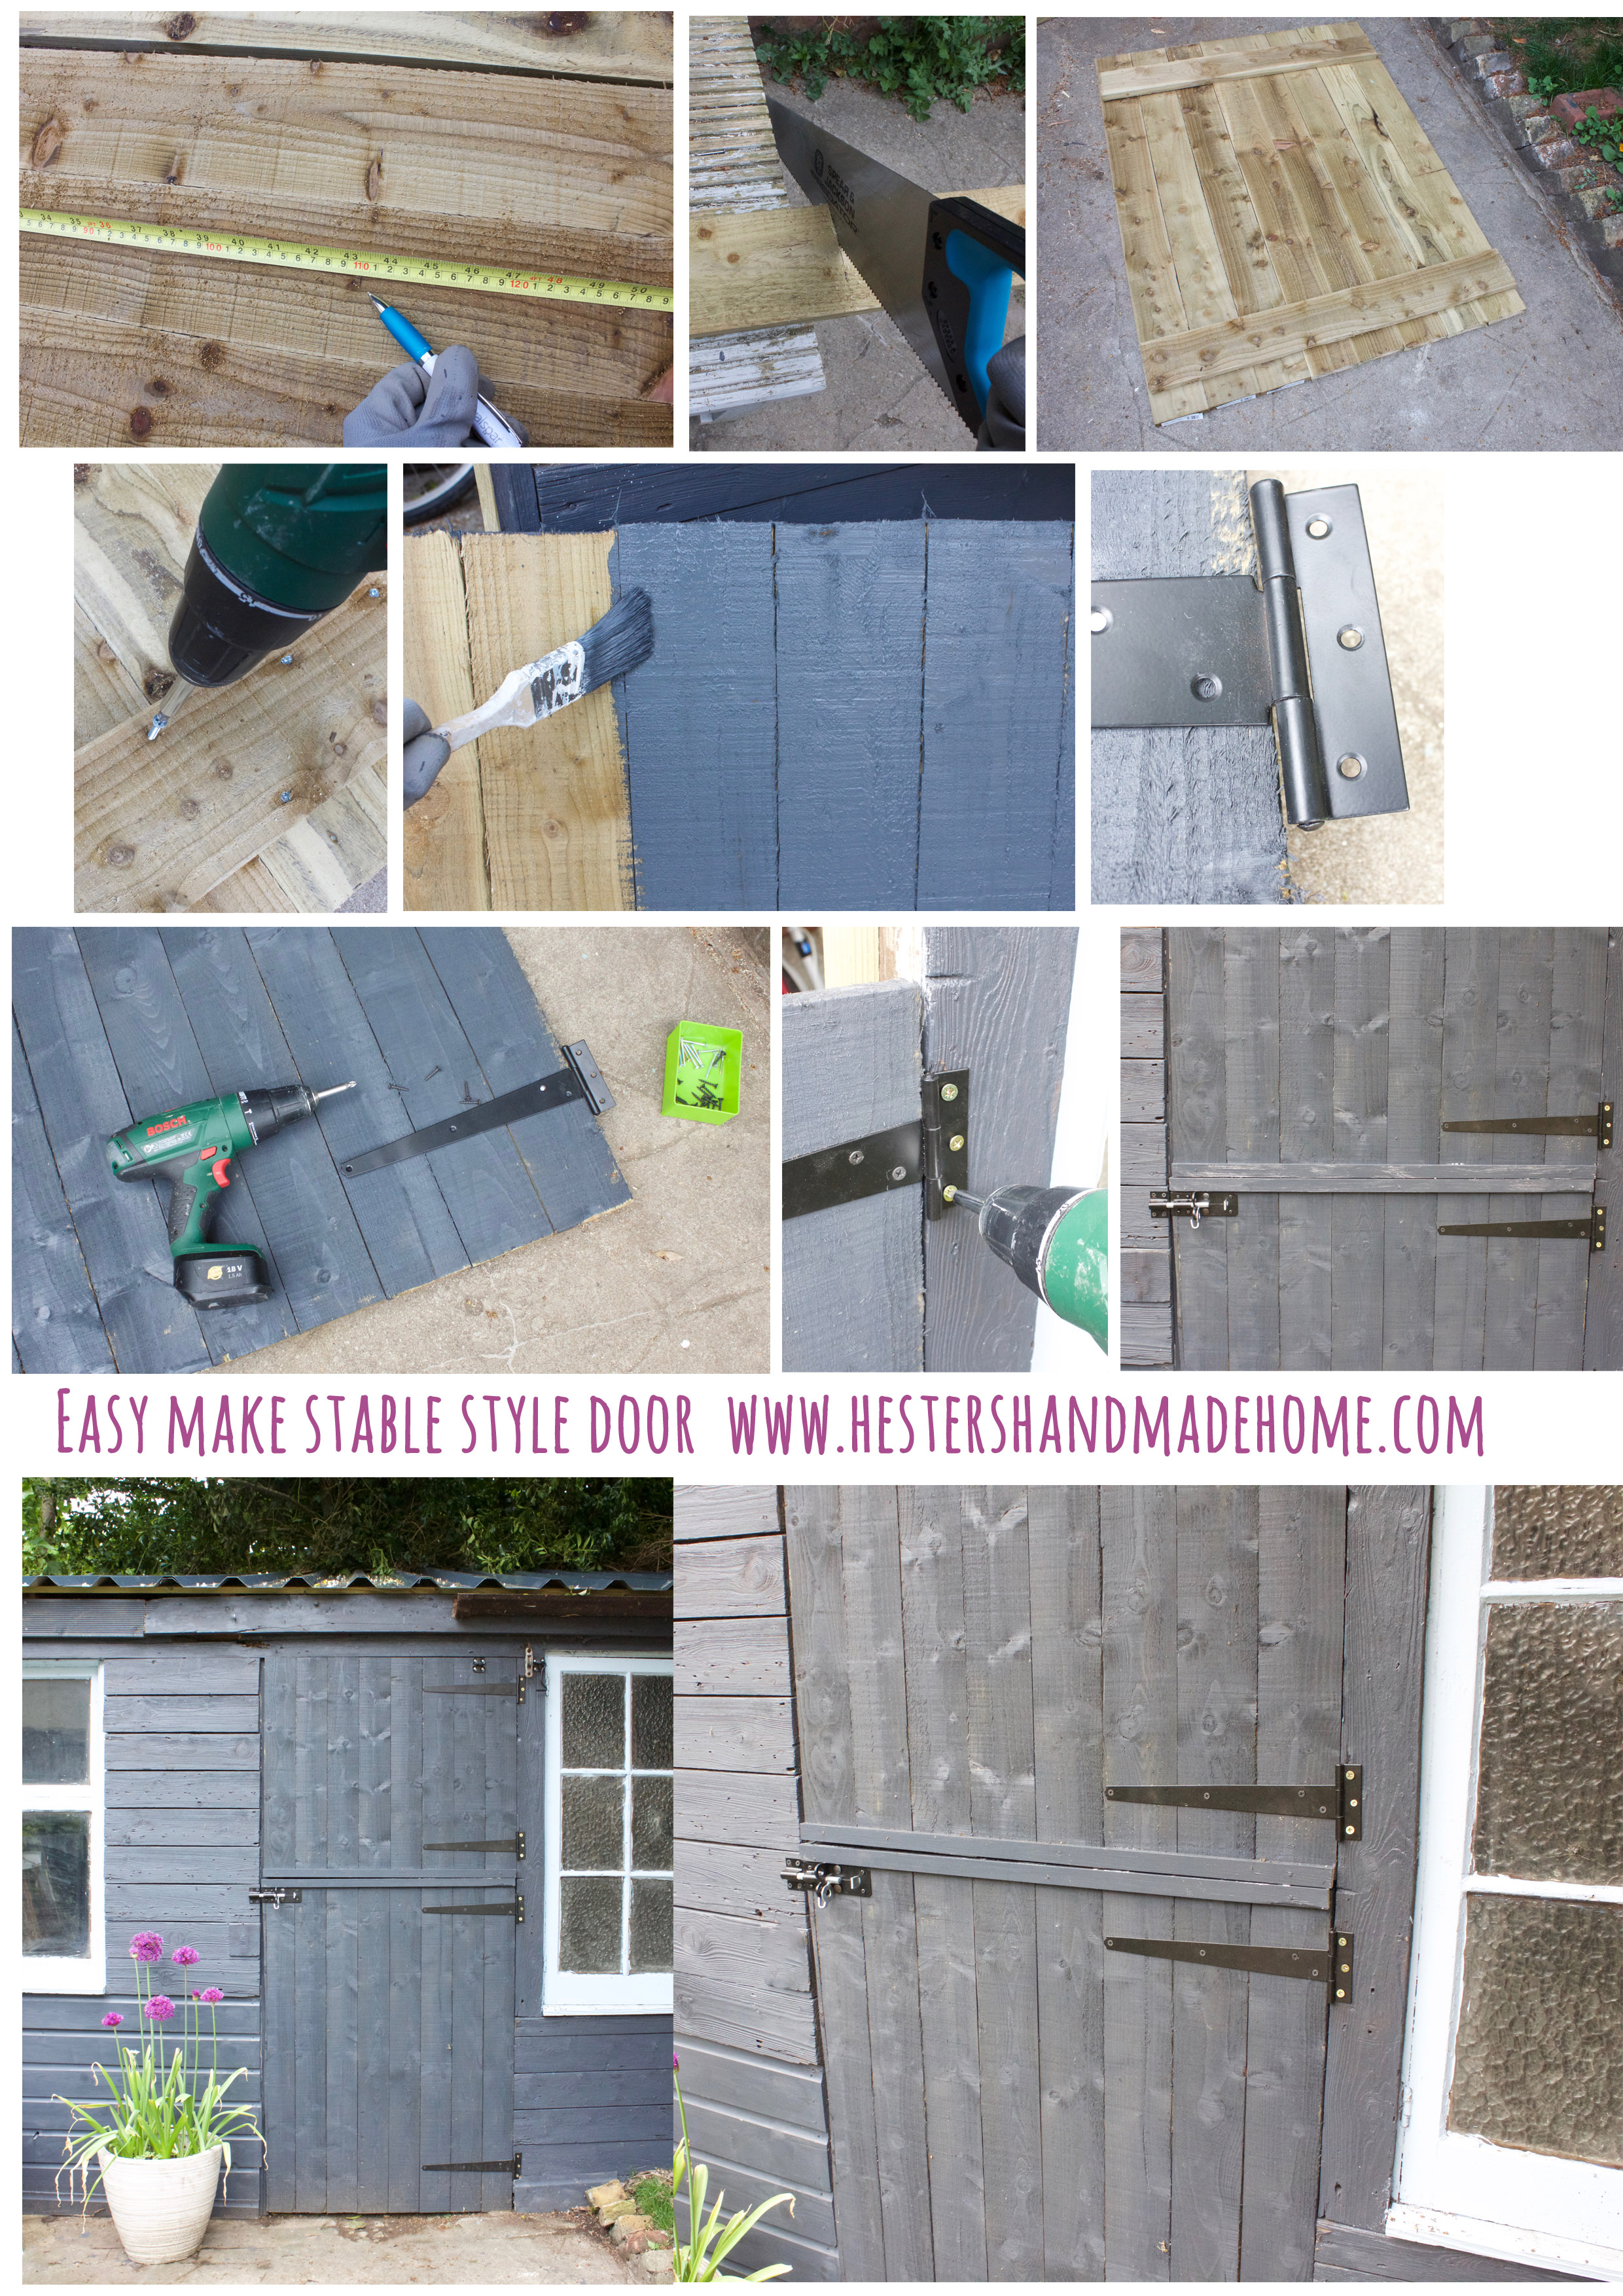
The stable door was very easy to make, all you need is outdoor treated timber, a saw, T-hinges, screws, paint, a little lock to keep the top door attached to the bigger one and a bigger lock for the outside. My door frame is 180cm tall and 80 wide, I used planks that are 180cm by 10cm so just needed 8 planks plus 2 extra for the horizontal back pieces. The bottom door is 110cm tall and the top one 70cm you can of course change these dimension to fit your doorframe. Have a look at the video to see how I made my door.
See, told you it was easy! This is just a very simple shed door, like I said in the video if you want a sturdier door you do need to add a diagonally piece between the two horizontal ones on the back of the door. Fancy making one yourself? Think the door cost me £30 in materials, a fraction of the price of a shop build one and you can make it to fit odd doorframe sizes . Your own made to measure door.
UPDATE-> I did add a crossbar to the bottom door about 4 weeks after this build, the sun started warping the timber but by adding an plank of wood diagonally between the horizontal planks the door is nice and straight again :)
Want to Pin this tutorial for future reference? Please feel free to grab the image below
I'll be back next week with a new tutorial, see you then! xx Hester


