DIY Scandi Christmas trees
In collaboration with RustOleum
Have you decorated your house yet for Christmas? I often leave it to the last minute not great as I love handmade decorations so simple makes are my fav!
Every year I like to try and makes something new and this year I used balsa wood (thin plywood) and RustOleum paint to make these simple, Nordic style, Christmas trees.. They are so simple to make you will end up with a whole forest in no time!
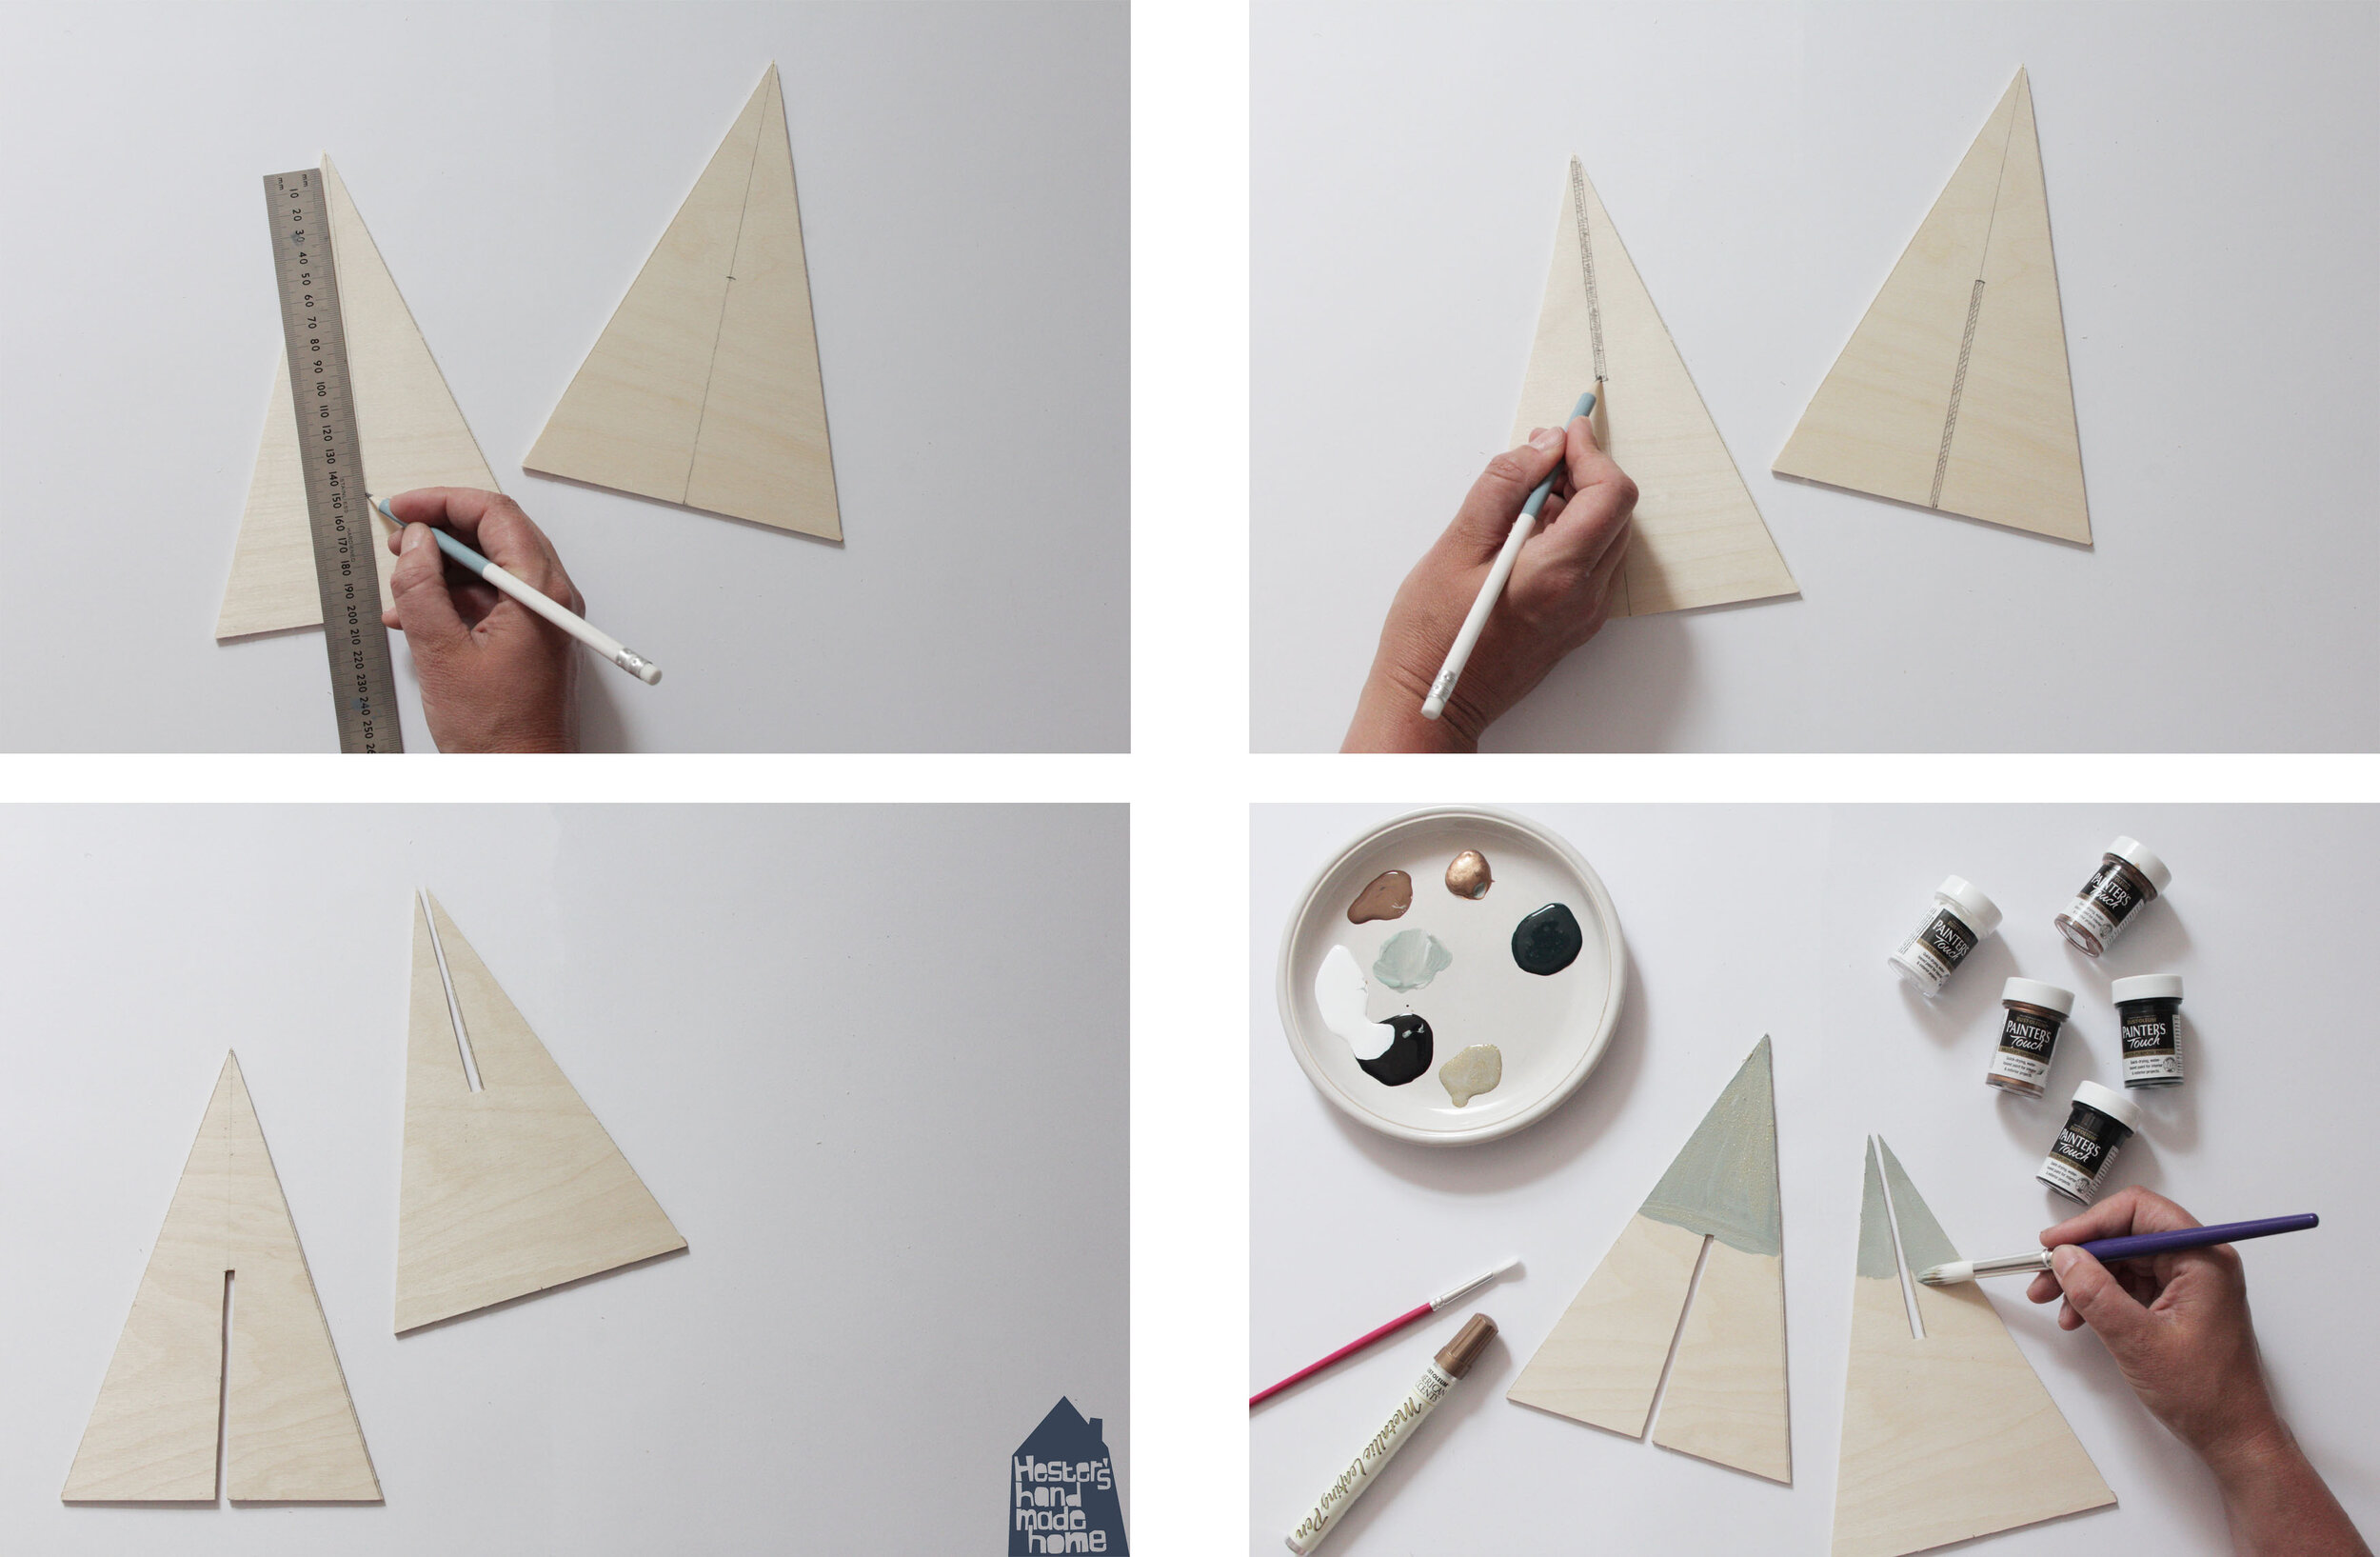
On your sheet of 3mm thick balsa wood, draw two triangles, ensuring they are the same size. Saw or cut the triangles out of the wood. I used a small saw to cut the wood but you can use a craft knife too. Make as many shapes as you want! Make all different sizes, some narrow and tall, some small and wide. Sand the edges smooth.
You now need to make the slots to put the tree together. Draw a line down the middle of your triangle and make a mark right in the centre of this line (my shapes are 21 cm high, so my mark is 10.5 cm high).
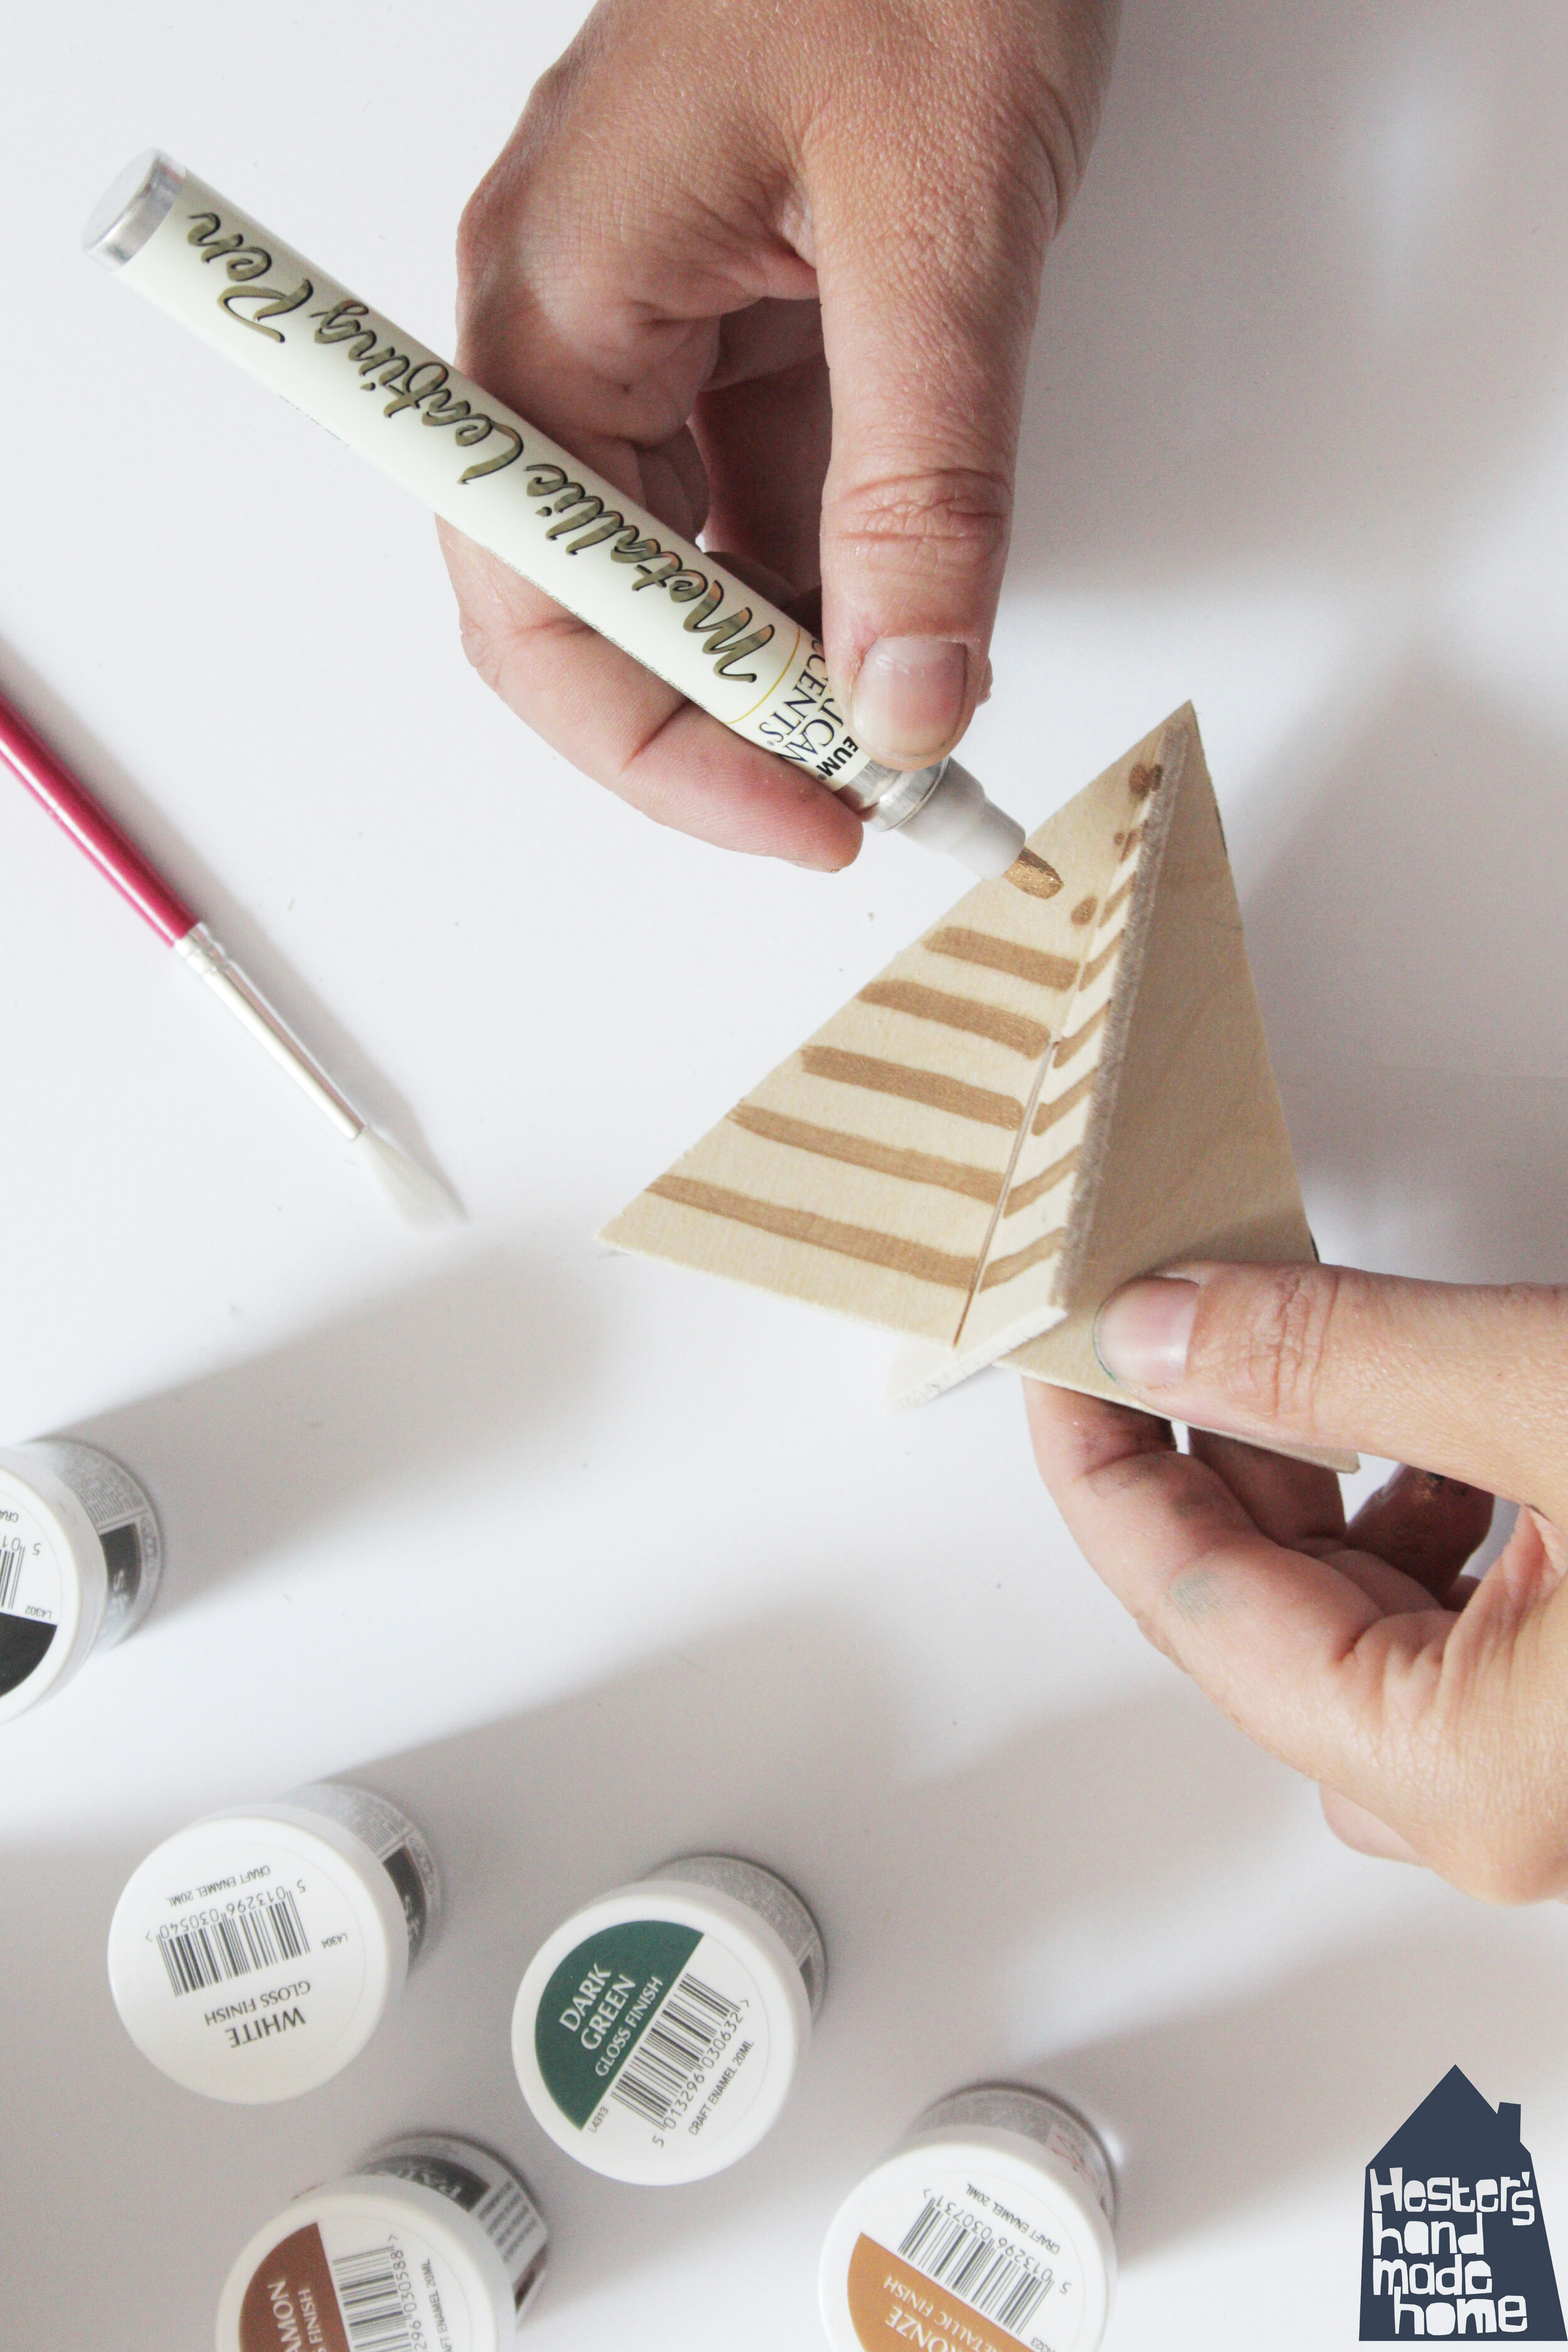
To decorate I used Rust-Oleum Painter’s Touch 20ml brush pots in Black, White, Bronze, Cinnamon and Dark Green. Painter’s Touch can be applied to wood, metal and ceramic plus it’s and water based, making it ideal for small craft projects. I also added some must-have festive sparkle with Rust-Oleum Glitter Ultra Shimmer, a high density glitter paint, available in three glittering finishes, Gold, Silver and Rose. Finally, I used the Rust-Oleum Metallic Leafing Pen in Gold to add details such as stripes, circles and crosses. You can paint the trees before or after you slot them together.
How would you decorate your trees? I think they might look real nice painted white with black dots (baubles) drawn on them. Brightly coloured with glitter or maybe even painted in chalk board paint and then draw the decorations on with a chalk pen!
Have a crafty Christmas!!


